Introduction to Embedded Systems :: CSCI 255
Lab Assignments
Lab 5 -- Seven Segment Display
HOME SYLLABUS HOMEWORK LABS LINKS NOTES
|
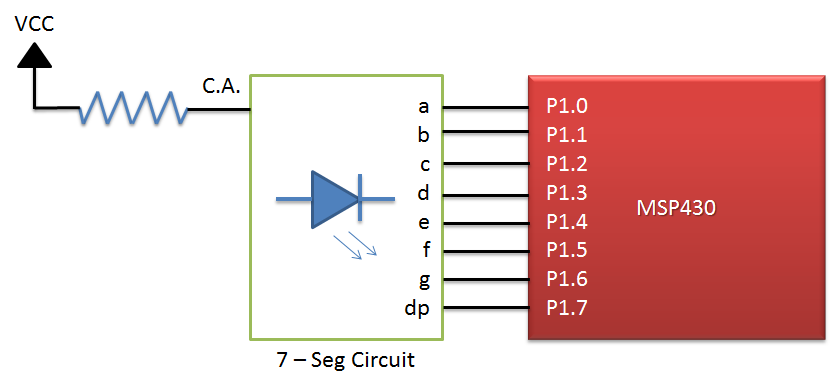
Part #1 – Countdown Single Digit DisplayCreate an assembly language program that interfaces with a 7-segment LED display. The display should start at 9 and countdown to 0, displaying each digit for exactly 1 second. When the counter reaches 0, it should then go back to 9 and then repeat countdown.
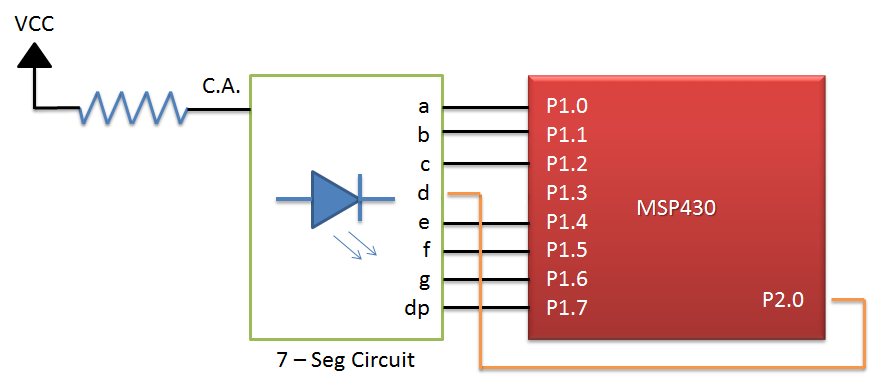
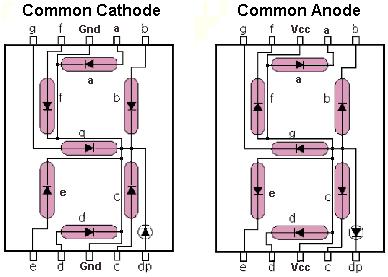
C.A => Common Anode. To see difference between Common Anode vs Common Cathode Since the 7-Segment Display is a C.A => To light up a section, the logic value is ZERO Part #2 – Countdown with ResetSame as part 1; however, when P1.3 Button is pressed, the program should then reset back displaying digit 9 and counts down displaying each digit for exactly 1 second. If the button is never pressed, the program should execute part 1 “forever”. Since we are using P1.3 as a Button, we then must replace the "output" values of P1.3 with bit P2.0 as seen below. Therefore, rearrange the program (& circuit) in order for the display to show all digits correctly by using both ports as outputs.
Part #3 – Countdown & then UP!Program starts executing part 1; however, when P1.3 Button is pressed, the program should then display digit 0 and starts counting up to 9 displaying each digit for exactly 1 second. Once it reaches 9, the program wraps around to 0 and continues to count up to 9. If the button is never pressed, the program should execute part 1 “forever"
Submission:1 - Have each part of the lab checked out by Matt, Clint or Damian by showing your code, flashing your code to the board, and display working circuit. 2 - Print parts 2 & 3 of the program with the following header: /*************************************************** 3 - Make sure you have a well commented code
Copyright © 2011 by Keith Vertanen. |
Montana Tech --
College of Letters, Science &
Professional Studies -- Computer Science
Department
All Rights Reserved and Copyright
© 2013 by Damian Valles